Monday, February 24, 2014

Fitting the Momos

Tonight I decided to try and fit up the momo wheels and find out if I need a spacer.


It's so close, it's almost painful. The wheel is bolted to the car and lowered but can't turn as it JUST contacts the control arm.


I could scallop the control arm, but I think a small spacer is a better bet, 8mm should suffice as the hub is 16mm deep and hence will retain support for the wheel, I'll just need longer studs to suit.

...or I could just scallop the control arm........

Time will tell.

Sunday, February 23, 2014

ROH Casino

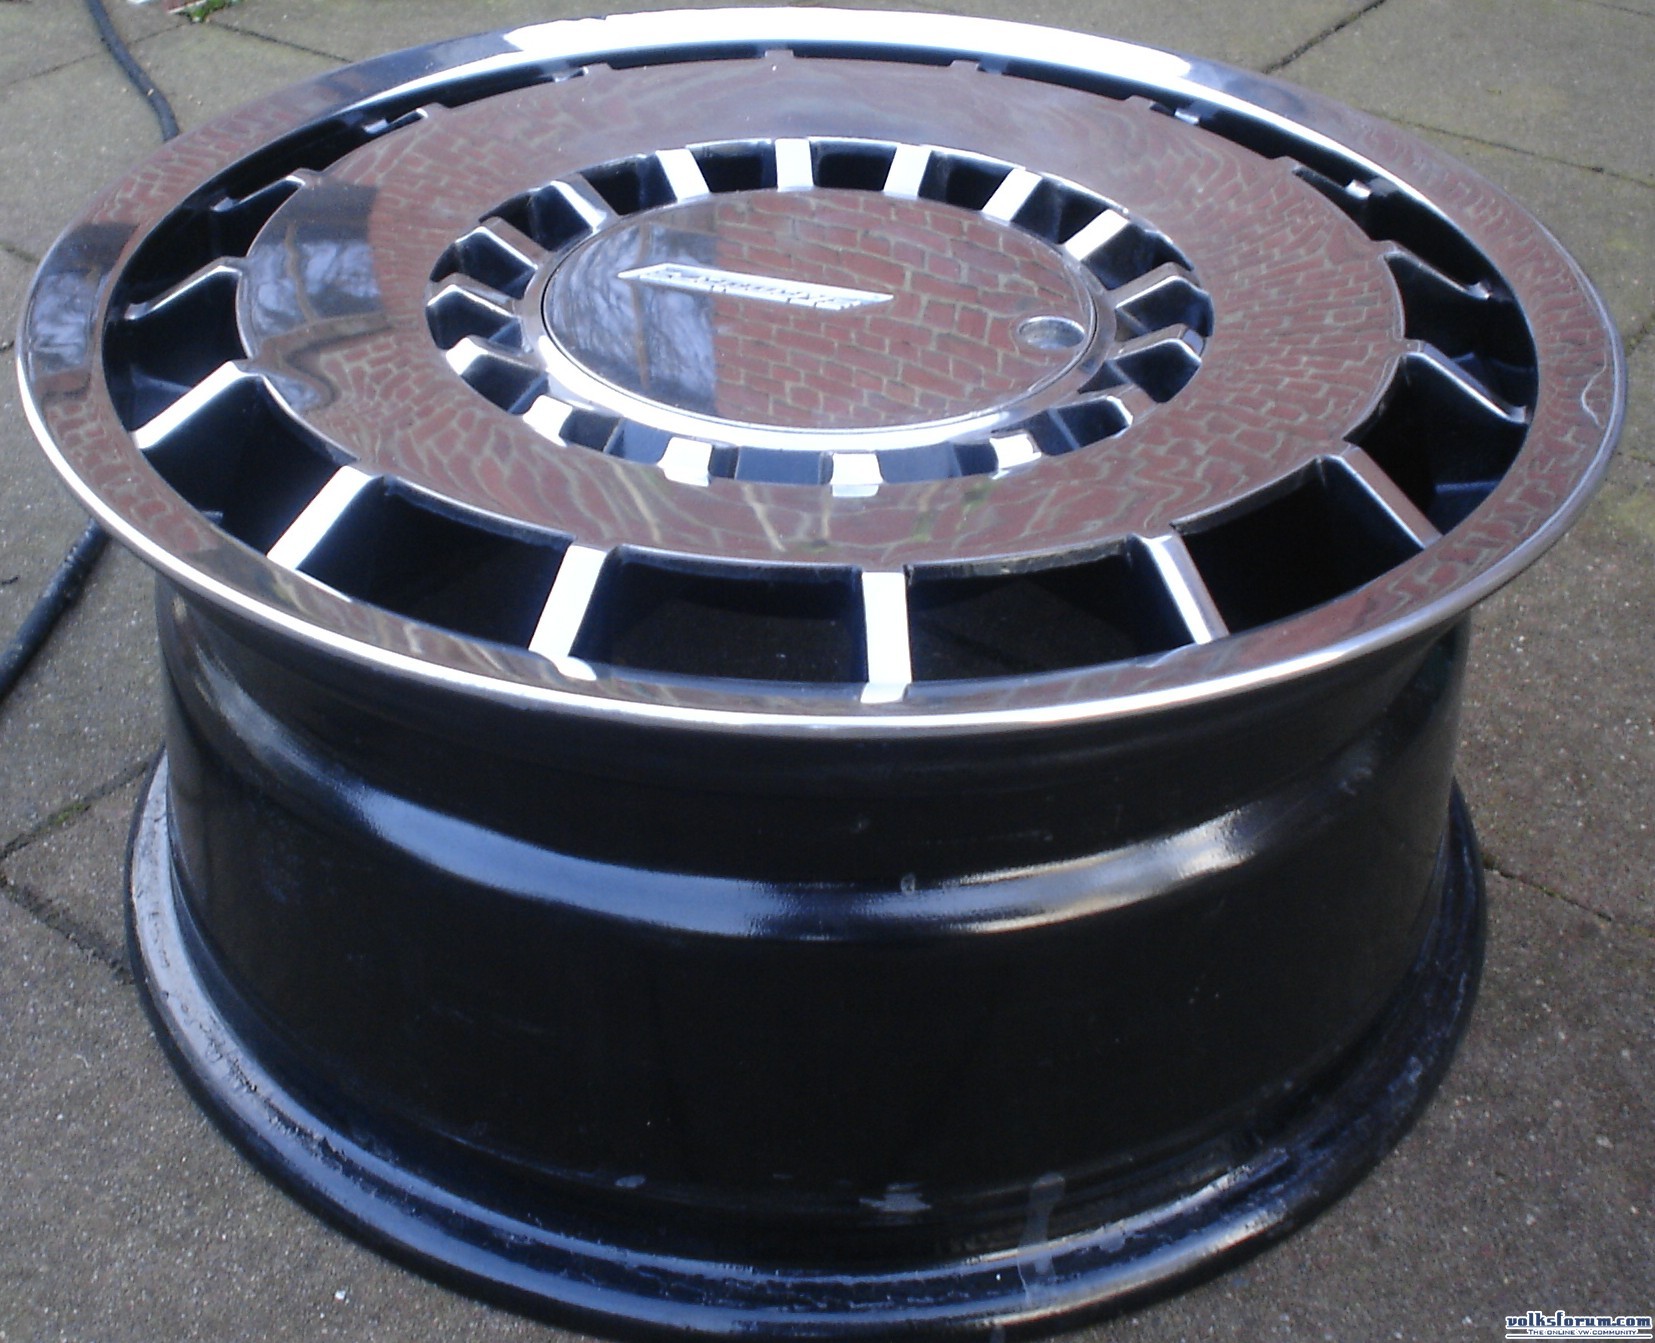
So it turns out (with no small degree of creative google-fu), the ROH wheels already on the E21 are called "Casino". I'm still not sure what offset they are as I've never even had them off the car (I haven't even removed the center caps) - I'll hopefully get around to that tonight when checking to see if the Momo 16"s will clear the suspension on the rear.

(source: http://www.ae86drivingclub.com.au/forums/showthread.php/20931-Project-TTA-turn-back-the-clock-to-Bathurst-1986/page2)

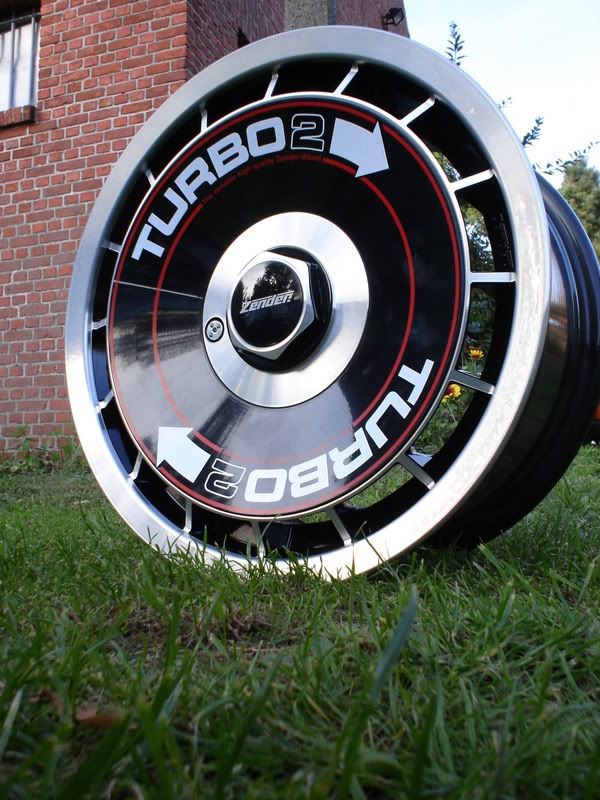
Interestingly, they seem to be a copy (or at least very similarly styled to) Zender's "Turbo"


It seems a number of brands made this style wheel so it must have been popular for a short while despite not being around in huge numbers now, Momo also made what I assume is a copy of the Zender wheel - they didn't even bother coming up with an original name for theirs, also calling it the "Turbo":


And who could forget, Ronal also made a wheel called the turbo; perhaps most recently best known as the wheels that were on rusty slammington.


So, with that, I'm no longer in the dark as to their origins. As to what if anything I do with their finish, I'm unsure at this point.

Multiple kinds of wheels

Yesterday, I went to the Ballarat Swap Meet with my father, and while there was keeping an eye out for a few things. One was a deep dish steering wheel to suit an aftermarket boss kit (rather than a splined factory wheel from something) and the other were 4x100 16" wheels.

As it turned out, almost every wheel at the swap meet was 5 stud, 5x114.3 or 5x120. Not ideal, but not surprising given most of the parts there were for Holden, Chev or Ford with a smattering of other parts interspersed.


The first find was these, a pair of Momo M1 4x100 16x7" wheels. They don't have an offset written on them but everything I could find on google points to them being ET38. I wanted these wheels as I still have a number of 16" tyres left over from my MX-5 which were the right overall rolling diameter for the E21, and should be good for a few sessions of drifting at least. They only need to fit the rear, and with some luck (the internet indicates it MAY work) they will fit without a spacer. If they need a spacer, I will have to get a 15mm one and longer wheel bolts; here's hoping they just fit!


It's almost a pity there wasn't a full set - despite looking a bit average when I first spotted them, they actually don't look like they'll suit the car too badly; and I could have always purchased larger spacers for the front (normal front offset for an E21 is around ET15). They came with Goodyear Eagle F1 tyres at approx 50% tread, all for the princely sum of $25.


The second find was this SAAS "GT" wheel from the late 70's early 80's. It isn't in mint condition (the finish is a bit worn, but the rubber/foam is still attached to the core and it feels like it'll have good grip. At $20 including the boss kit (which I should be able to sell; it's a SAAS 24 for deep dish wheels if anyone has a HQ-HZ or VB-VH?) it was a bit of a bargain. It's a deep dish wheel (see below) and of course being SAAS it's an aftermarket wheel so it fitted right onto the car....


Except that it didn't.


Here's the reach with the original wheel - not too bad for wheel to shifter movement, but too far from the seat even with the seat back almost completely upright. Not ideal, given that the seat is basically sitting where I want it at the moment.


Here's the problem. The old wheels obviously didn't have a locating hub. Over the years, it looks like wheel and boss kit manufacturers have added a 60mm locating hub to quality boss kits, to ensure the wheel stays centered. I used the original wheel I had on the car to mark the hole, then spent what felt like two hours filing. Note to self: get a sanding roll for the drill in case I ever need to do something like this again!.


I also countersunk the holes to use the Allen head bolts that were holding the original wheel to the car.


It's a slightly different angle, but here's the new location of the steering wheel. It's much better; for starters it's actually round unlike the one I removed, and secondly because of that I can read all of the instruments. I can also nearly reach the whole wheel properly. The E21 doesn't have rake adjustment but I think I can modify it to give me an inch or so of rake (with a spacer) which should properly sort it out.


Side on. This image is a reminder of why I should endeavour to use the SLR to take images rather than the iPhone.


Interior shot from the driver's seat. It looks much more period correct (not that the motor choice is - shhh!)


A shot of the fuel cell and pump arrangement since I've got the camera out. I'm going to upgrade the fuel supply hose to the pump to a 1/2" ID hose with -8AN (or JIC8) fittings, as I already have the -10 to -8 adaptor on the tank, and a -8 to 18mm/1.5 adaptor for the fuel pump.


This shot shows the wiring running to the driver's side headlight/indicator assembly.


And I'll leave you with this photoshop of Scarlett in what looks like a moving E21 (it's from a static shot!)

Wednesday, February 19, 2014

Watercooled!

I'm on two weeks leave now, so with a little luck and a lot of persistance, I should be able to make some decent progress on the car.


Gave it a quick clean down with a chamois and a bucket of water. Nothing too special because of the lack of boot and sunroof seals. I'll have to do something about at least the sunroof before I use it in any events I think.


Whipped up a quick trailer from an old A frame, some Holden Statesman IRS arms/hubs and a couple of commodore interceptors. This is to tow behind the ride-on mower so I can move things from the back shed to the front or vice versa easier.


Made a bottom radiator support for standard width "skinny" radiators (like my aluminium one I've been using for all this mock-up work). I also bashed the metal next to the lower radiator outlet to make it easier to install/remove the radiator with the top support in place.


Welded on. The groove captures the front-most part of the radiator... or at least it does for standard ones. I installed my larger copper core radiator when I tried to fill the alloy one and discovered I'd broken an end tank trying to work out how to get it in and out before hammering back the metal near the lower outlet.

The bigger radiator straddles the bottom mount so holds it securely enough anyway. I'd love to say that was by design but sadly, just a coincidence. The radiator cannot move side to side once in situ because it's a very tight fit between the two side bars on the fan mounting rail.


Here I've finished modifying and boxed in the area where the top hose goes; unfortunately I mis-measured this area slightly when making the radiator support so this unsightly solution is the result.


Hooking up the side hose, lower hose (I have used some 38mm copper cut to size as an interim solution while I wait for my aluminium joiner to come from eBay)


Also hooked up the bleeder hoses. As best I can tell this will work very similarly to how it does in a Falcon and mean no airlocks.


Brackets made to hold the top of the radiator. These worked slightly better with the skinny radiator but still do the job with the larger one (not pictured)


A better shot showing the top mount and top hose clearance.


From the other direction.


Hooked up the coolant temp sender to the gauge. I did a bit of looking on the internet and as best I could tell the senders and gauges used across the industry (except for digital ones) are pretty well universal.


Here's a video from before the coolant temp sender was hooked up. The popping on revs indicates the car is running lean. I've since adjusted the injector scale back to 36lbs (from memory it was at about 38/39) and it seems to have fixed this issue.

Next job: mount and wire thermofan, then modify bumpers (if required) to clear the fan. Once that's done I can start working out how I'm going to mount the lights and light surrounds.

Thursday, February 13, 2014

Bottom Radiator Hose - Almost There!

A week or two ago I jumped on eBay after selling a few spare RB25 Coilpacks and ordered up what was the closest I could determine to the required hoses to make my bottom radiator hose.


The first to arrive is a 5 ply, 90 degree 38mm bend in black. I got this particular hose because the overall dimensions and bend looked suitably tight for the location I needed it to fit. This is of course all guess work. There were plenty of 90 degree 38mm or 1.5" ID bends to choose from on eBay.


Scarlett has been insisting in recent weeks that we really must "build Daddy's race car" - as ever, she's keen to help out.

This is a rough idea of where the first hose will sit.

The second hose has since turned up, this hose was much more difficult to track down, despite having being named (rather obviously) 1.5" inch to 1.77" inch 90 Degree 38mm to 45mm Silicone Pipe Coupler Hose/pipe. The reason I need this hose (a reducer) is because I've got two very good/almost new EA-ED Radiators which have a 44mm outlet and no EF/EL or AU radiators (which use 38mm outlets on both top and bottom hoses).

Because I'm running the serpentine belt setup on this engine, the water pump has a 38mm outlet. In my falcon, I'd just made do with a very old (read: soft) lower radiator hose with the anti-crush spring removed, and doubled up on hose clamps to prevent leaks. This worked sufficiently well for a long time however there was no easy way to modify a falcon lower hose for my uses this time around as the bends in them are too lazy for the space available.


Some trial fitting later, and what you see is the aftermath of the small amount of modification required to make it fit snug.

Pictured here to demonstrate with electrical tape holding the two pieces together, I've measured and need a 38mm/1.5" aluminium joiner with an overall length not greater than 50-60mm. Most on eBay were 76-100mm or longer; because I have no room to increase the gap I need the shorter joiner. After much deliberation (there were eventually only two I could genuinely choose from) I picked this one.

In the meantime, I think I will get a piece of 38mm tubing/pipe just so I can get some water in the car and try and sort out the (currently extremely rich at idle) fuel mixture.

I'm also probably going to re-do the top hose at some point; what I've got will work for now but ultimately I'm not confident I can rely on it for track use as it's an old BMW hose and only barely goes onto the barbs  at each end. Back to eBay to try and find the right 50mm clamps to hold the whole shebang together, and a long enough 38mm 90 degree bend to cut down for the top hose.