Thursday, October 31, 2013

A quick update... Progress is stalled

Just a quick update from my phone - my home internet is capped for the next seven days (I hit my 400GB limit again) so this means two things: one - I can't really edit my images before putting them up, I have to upload them from the phone, and two - I will be making more progress due to lack of Internet than I would otherwise be making.
Here I am fitting my 5/16" hose fittings to my Bosch 044. I have a feeling that before I actually use this setup I might change to a filter with larger outlets than 5/16" - maybe -8AN in and out - that way I can have a less restrictive inlet.
5/16" inlet fitted.
Pretty sure it's a genuine pump, the stamping looks authentic and it's definitely heavy enough.
I got the eBay seller who sold me the fuel tank to refund me the cost of 2x -10AN female to -8AN male adapters and ordered those from another eBay vendor - they finally turned up so I have been able to fit the -8AN -> 5/16" hose barb adaptors to both the supply and drain locations on the tank.
Now all I need is to fab up some brackets, wire up the pump, hook up some hoses and chuck in some fuel and we'll be able to test it all out!

I put the bonnet back on the check the alignment of the new radiator support frame before I bolt it into place - looking pretty good - more below:

With a few minor adjustments I should be able to drill it out and weld in some nuts allowing this to bolt in place. Once that is done I can weld a mount for the brake booster support, a couple of headlight brackets and the radiator itself. I can then start to build a bar to sit inside the bumper and to hold the fan assembly in place.

My wife is going out of town this weekend with the kids for a week, I would imagine the combination of their absence and the Internet situation will result in some fairly rapid progress.

Once the fan assembly is in place, and radiator is mounted, I can sort out the bottom hose (I don't think the flexi hose I got will do the trick so it's looking more and more every day like I will have to use two 90 degree silicon bends (one as a 44-38mm reducer) and a joiner with thermostat (purely because these are easy to find!) to sort that out. Then in combination with the fuel system I might actually be able to have the car idling for some time!


Friday, October 25, 2013

Revised Radiator Support Part 4 - Making It Fit

So I decided the other day that the first step to getting anything done on this project (any my other cars here for that matter) would be to write out a list of what needed to be done. It turned out extensive, but while it looks like a lot written down, it's actually less than I thought I had left to do in my head. I'm aiming to start putting lines through as many of these as possible.

Unfortunately it's been raining fairly heavily for the last few days here and my shed is yet again flooded. This means I can't really get any welding done as I'm a bit skeptical about welding while standing in a puddle; I also want to do the tailshaft center bearing mount and the seat rails which requires being on the ground and hence the ground being dry.

I removed the bonnet and eyeballed the Revised Radiator support the other day, and tonight I decided I had better get stuck into it. It's always a daunting process (at least for me) cutting away existing things that fit or work to make way for something you aren't quite sure will fit or work as intended, but it has to be done sooner or later! Procrastination doesn't get you anywhere.

Here I've unbolted the current removable radiator support.

Sitting on top of the remaining side wings. I could completely remove these wings but they have the top mount for the headlight buckets at the moment - once the new support is mounted I'll work out a way to weld these to the new mount and remove what's left of the original section.

Back and side risen sections removed. Precision angle grinding ;)

Trying to be tricky and just clearance for the brace. Best laid plans of mice and men as they say - I ended up having to cut more off anyway so a bit of a wasted exercise.

And here you can see what I meant by "more". 

On the brake booster side of the bay.

It drops closer to "in place" now. 

The only thing I'm not sure on now is how flat it should be sitting. I need to get the bonnet on and eyeball it I think - it's probably meant to be level to the ground - at the moment it's leaning down toward the front per this picture. No doubt there's a bit more cutting to go before I can drill and bolt the support to the car. Once that's done I can start putting in the mounts for the lights (under the support), the light surrounds (at the front - some need slight stand-offs for the screws) and of course the radiator.

Friday, October 11, 2013

Revised Radiator Support Part 3 and Fuel System Fittings

Had an awesome time tonight introducing the new garage to the concept of welding.


Can't be stuffed going out to the back shed to get the flaps wheels to clean up the welds so I'll do that tomorrow and also get to cutting away the original support.


I purchased a used, genuine Bosch 044, and fittings to suit both it and my fuel cell - all of which have since arrived. Unfortunately the fittings for the fuel cell don't fit because despite the eBay seller advertising it as having -8AN fittings, it actually has -10AN. I've requested they supply -10AN female to -8AN male reducers to rectify the issue. If they don't I'll lodge a paypal dispute. It's only $8 per reducer to just buy some but I think it's only fair that they should have to fix their mistake on principal.


I've also ground down and painted up an AU rocker cover for the engine. The yellow doesn't work in this engine bay - I think the cast iron finish will work much better (although time will tell for certain!)


The finish isn't perfect however once I sort out an airbox etc you won't be able to see a lot of the rocker cover.

Sunday, September 22, 2013

#Flashback - 2009

Flash back to 2009 - 4 years and 4 months ago this project started.

Getting keeeeen!

Friday, September 20, 2013

Fuel System & Battery

I've been doing some thinking lately in regards to the fuel system, and as luck would have it, I found a buyer for the standard Getrag Manual from the car.

As a result, this has allowed some "self-funding" for some desperately needed parts for the car. Today I placed an order for a 40L Aluminium Fuel Cell from At Racing World via eBay:
I'm also in the process of trying to work out what Fuel Pump to buy to support the 4 Bar regulator. I know a lot of the Bosch 044 pumps on eBay are of questionable origin, as are the Walbro ones, so this process could take some time.

Another thing that's caught my attention (because currently I have a Lead Acid Battery mounted in my cabin) is this thread: http://www.clublexus.com/forums/is-f/453774-what-you-guys-think-of-my-3-5-pound-battery-8.html


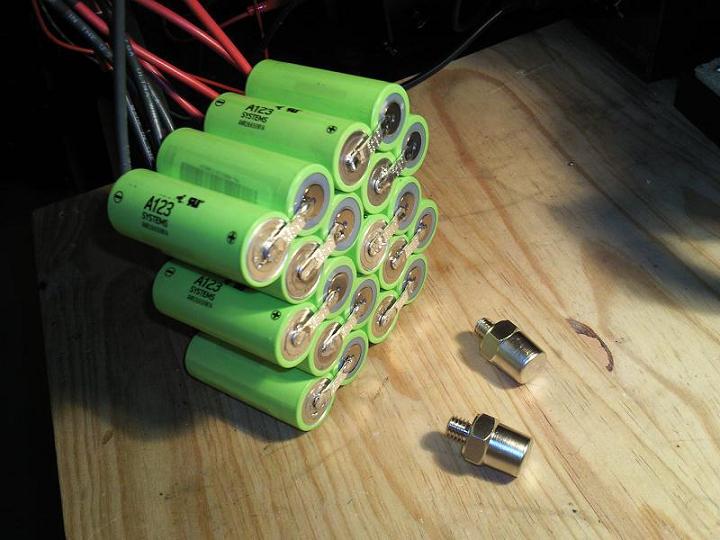
Basically it outlines a battery made from Lithium Ion cells that is 400CA, 11Ah and only 3.5 pounds (1.6KG) which means it's small, convenient, and better suited to sitting in an un-used car as it will lose less power when sitting disconnected than a traditional battery would. It also means there is no requirement for ventilation, so I'm thinking something like this might be the go for the car too.

Wednesday, September 18, 2013

15A Welding Circuit - Finally!


Ever since I moved house a few months back, I haven't been able to weld in the front garage (where the car is) because the garage powerpoints share a circuit with the kitchen, laundry and study. These three rooms already struggle with power, tripping a 15A breaker so many times I've had to resort to installing a 20A breaker on that circuit, and I didn't want to risk losing data from my PC or NAS, or damaging my fridge etc by welding on that circuit.

So, I've finally had a dedicated 15A welding circuit all hooked up and it's ready to go! Now I just have to get my welder back from my old man (who is using it to weld replacement panel patches onto his 1974 Chevy Camaro project) and I can tack this brace together and test-fit it!

Sunday, September 15, 2013

Revised Radiator Support - Part 2


Dragged the chop saw out and quickly cut up another length to make manuevering it around the front shed a bit easier - the setup in this back shed is getting closer to how I want it but it's still a bit of a chinese picture puzzle moving things around when I need to use the space. There are a few items yet to find a new permanent home.


Chopped to near the desired size, ready to go.


Tonight I got sick of not being able to see. I've picked up four fluro light fittings which I have to repair and can then mount to properly alleviate the issue, however in the meantime I've replaced one of the compact fluro globes with a 200w 240V incandescent globe (see if you can guess which one from the photo above)


 As a result, I can see somewhat better now - although the main issue with these lights as they sit is their location causes nasty shadows unless you're working with your back to a wall, and is useless almost anywhere if you have to work on the side of something. Here I've cut out yet another section of the radiator support. 


And another. I'm noticing as I go that my drawing isn't quite sized accurately and as a result some of the angles are resulting in larger than ideal gaps. This will make the welding interesting. I may have to re-do some of the pieces to save a bit of time and frustration in the welding process. 


Here's another piece added to the mix 


This long bar will run across just above the belts on the engine. I am hoping it clears the top radiator hose. If not, I'll have to cut it and build a new section that goes up and over once the rest is done.


Here I've cut the far end and matched it all up to make sure I'm keeping my overall width correct. All looking good so far!


Essential safety gear - protective footwear not required!


Just a reminder of the abomination I'm replacing with this new assembly


The first of the front pieces done - note that the original (see line to the left of this bar) radiator support has a slight curve - I will be welding on some spacers for the headlight surround mounts once the rest is complete.


And the other side, here the curve is still present although the angle of the photo doesn't really show it.


Front piece done - once this is welded together a couple of tabs will have to be added to this piece as it's actually higher than the rest (for the grille mounts)

Can't wait to get it tacked together so I can sit it over the car to check it's all O.K.

Friday, September 13, 2013

Revised Radiator Support - Part 1

So tonight I decided if nothing else I'd measure out and draw up the essential dimensions of the radiator support.


That was easy enough. What do you know, now I have an empty bench top with a sander and grinder, and my angle grinder is in the front shed. Off for a short trip to get an offcut of 25x25x2mm galvanised RHS from the back shed.


A closer shot of the driver's side - this is shown from "underneath" due to the way I used the light plastics as a template for the front edge. Note the cross frame - this is for strength - the reason the member at the top comes in sharply is that it has to go around the coolant reservoir. You should also be able to make out where it's marked "booster" - this is where the factory booster bracket mounts and is at the same angle as the original. I am not sure how it will compare in terms of height however if required I will just weld a sleeve to the support for the bolt to hold the brake booster. Note the radiator sits level with the booster as well so I can't just have a member straight back from the booster to the "front"


Passenger side - crossed out line follows factory piece dimensions, however cross brace needs to run between engine and radiator so I have adjusted to suit.


The sander and grinder were both being stored on this bench. That's handy!


Piece "A" cut and placed on the template. This is pretty quick going. If only I had my welder handy to tack these in place.


Piece B - seems to be lining up pretty well so far.


Piece C - a bit of a hiccup in the top corner with a larger than intended gap. It's ok, I can bridge that with weld easy enough.


These corner joints look to be the bomb. 


Another couple of pieces before I ran out of offcut steel. I'll have to grab another length from down the back tomorrow to continue.